Tuesday 30 December 2014

Front Suspension rebuild Part 3 - Clean up and reassembly begins


After blasting the all the wishbones and the steering arms I proceeded to acid etch prime, paint and lacquer them. I decided to Go with a Black finish on most of the suspension components apart from the wish bones which I did in a Rover blue.


A noticeable difference between the pre and post blasted and painted wishbones. After the lacquer i proceeded to clean out the paint from the bush holders on the wishbones with a flapper wheel on a cordless drill.


The uprights were coated in black, (the red primer managed to get through the masking a bit sadly and had to be cleaned off the machined faces) but i found that the black gloss take take well and was chipping easy.  I fitted new Grease nipples to both the uprights after painting.


After this I proceeded to press the stub axles back into the uprights. I did this with the the castle nuts on the stub axles so not to damage the soft ends of the threads of the axles.

 Next after all the main components were painted I decided to do a mock assembly of the upright assemblies with the painted components and a set of new MK2 Jaguar top ball joints ( same part as the Scimitar but easier to source and cheaper)


The top ball joints were a bit of a pain, obviously as its a spinning ball with a threaded stud its almost impossible to tighten to a suitable toque as once you start tuning the nut onto the ball the ny-loc bites and this transfers the toque from your spanner to the ball overpowering the friction cohesion between the ball joint and its socket causing the ball to spin. Therefore the nut has to be shocked tight with an impact gun.  The nut of the all joint went on tight with an impact gun on a aprox 12-15 deg angle with a UJ as the stub axle rear nut prevented the gun even with an extension from applying the torque in a liar direction.


I next fitted the caliper carrier, steering arms and my new spacers temperately as a mock up with the old fasteners to make sure it all still went together. Some of the upright threads required a plug tap ran down them first to clear forty years of rust and dirt from the depth of the threads.


At first I thought I was satisfied and then after pressing the bushes into the wishbones and fitting the Nylon bearings and the newly  chemically cleaned and polished brass bottom trunnions  I decided I was not satisfied.


The paint ad not taken to the uprights to well and was chipping easy and the blue wishbones just looked awful with the yellow SPAX dampers. At this point I decided to strip it all back down and send the lot for blasting and black powdercoat.

I have a good rate at a local powdercoaters and decided that acid etch wasn't going to cut it with this car, so the whole suspension system, front and rear and any other components I plan to salvage re going for blasting and coating.


More on the suspension to follow in much more detail


Front Suspension rebuild - Part 2 New Steering arm spacers

When breaking down the front suspension I found that the spacers that set the position of the steering arm at the correct distance from the steering pivot to get the correct Acherman angle were pitted, worn on the edges and soft.

So I proceeded to make x4 off new spacers from a 1" Round bar of EN24 Steel.


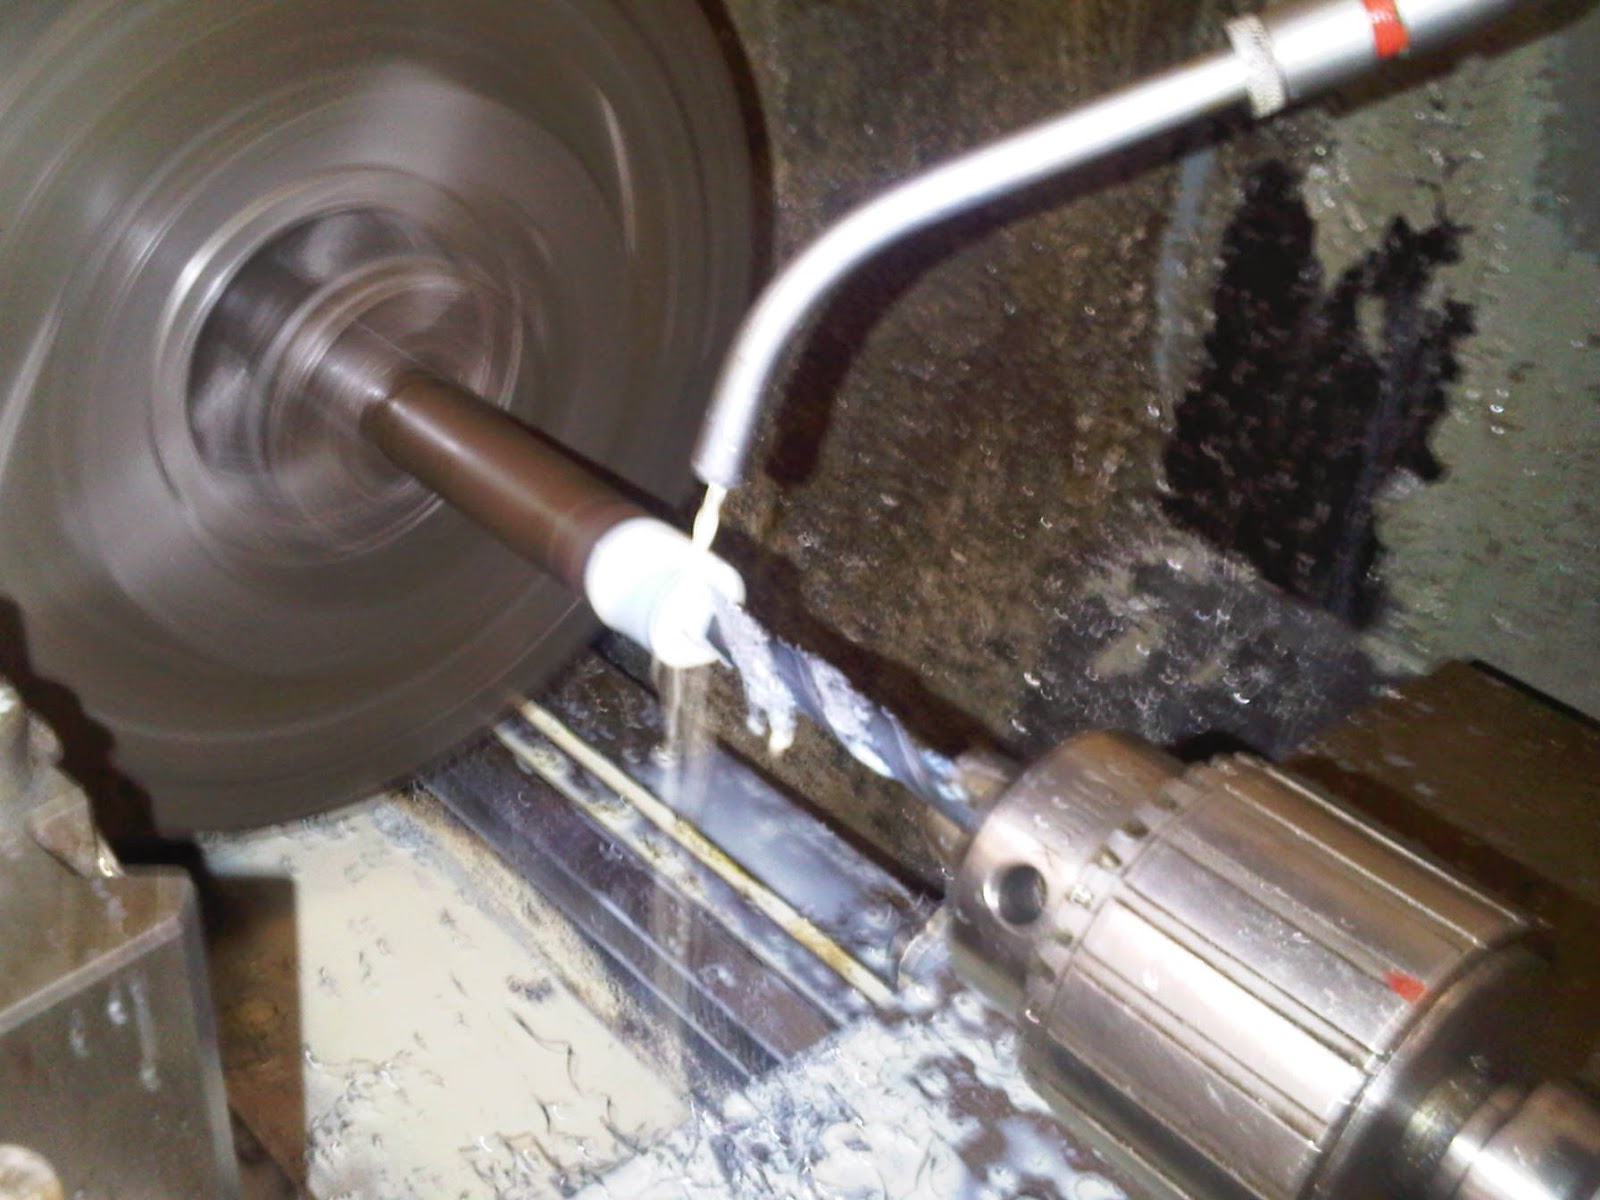
I started with a the bar  clocked in and the faced off and center drilled.


I then proceeded to drill the bar in 6 going up in six increments, then finally reaming the bar to 5/16"


After this A proceeded to turn the bar down to 3/4"


I then parted off tow spacers and repeated the above procedure after moving the bar further out of the chuck and clocking it back in.

Some would suggest it would be easier to use a revolving center and turn the whole bar down in one go. They wouldn't be wrong, either way works. it only took me an hour to make the four spacers so there was no real loss of time making the spacers in two batches.


After parting the jobs off the bar i then faced off all the spacers to the correct size and broke the sharp edges leaving x4 spacers ready to use with the suspension rebuild.

Saturday 3 May 2014

New Tremec T5 Gearbox

It has come to light after more detailed measurements that my Borg Warner T5 I've had for some years is not suitable for fitting to the Rover V8 in the Scimitar. as such I have purchased a Tremec T5 with 30K miles on the clock form a TVR Griffith that met its doom with the aid of a lamp post.

The Box from the TVR is manufactured by Transmission Technologies Corporation (TTC) under the Tremec brand after a sale of the gearbox design, however the design and build of the box is identical to the earlier Borg Warner counterpart.

The new TVR box itself is in fact originally a derivative of the gearbox for the Ford Mustang and although the same basic gearbox as the Cosworth gearbox there are some dimensional differences between the two units, the main reason for opting to use the TVR Box over the Sierra Cosworth Box. The input spline is identical to the Cosworth box however the OD of the output shaft is larger and contains 27 splines over the Cosworth 25 splines but this isn't a problem, it just means a TVR slip yoke instead of a Ford slip yoke. The main reason to choose the TVR Box is the position of the gear selector, after a mock fitting it was found with the gear stick position is far too far back from the dashboard to be practical while driving.
 
Despite the differences in dimensions the gear ratios are the same as the Cosworth Borg Warner T5:


  •  1st = 2.95:1
  •  2nd = 1.94:1
  • 3rd = 1.34:1
  • 4th = 1:1
  • 5th = 0.80:1

The reason for the swap is some years ago I turned down the face of the nose in the Cosworth box and parted off a section of the thrust bearing shaft in order to adept the nose to fit into the new bellhousing and work with the concentric slave cylinder.
It goes without saying I will replace the main taper roller bearing and the mating race pressed into the nose too, as its never clever to swap to races and bearings that have been ran in together.
The new Tremec 5 Speed box with light weight Rover V8 bellhousing and concentric salve cylinder built up and complete ready to be bolted up and fitted into Scimitar to begin getting the engine positioned and a new gearbox mount measured up and fabricated.


The current Scimitar rear axle final drive ratio is 3.31:1

The V8 will have a Peak power at 6000 RPM and an inflated Tyre diameter of 12.126."

Speed in each gear at peak power of 6000 RPM:


  • 1st = 44.3 MPH
  • 2nd = 67.4 MPH
  • 3rd = 97.6 MPH
  • 4th = 130.8 MPH
  • 5th = 163.5 MPH

The Cosworth box will not go to waste, future plans will see it fitted to another project car. the new box is solid and with only 30k miles on the TVR's clock before it was glass-fibre dust the gearbox will not require a full rebuild like the Cosworth box.


 The Cosworth T5 box bolted to the engine in mock position.


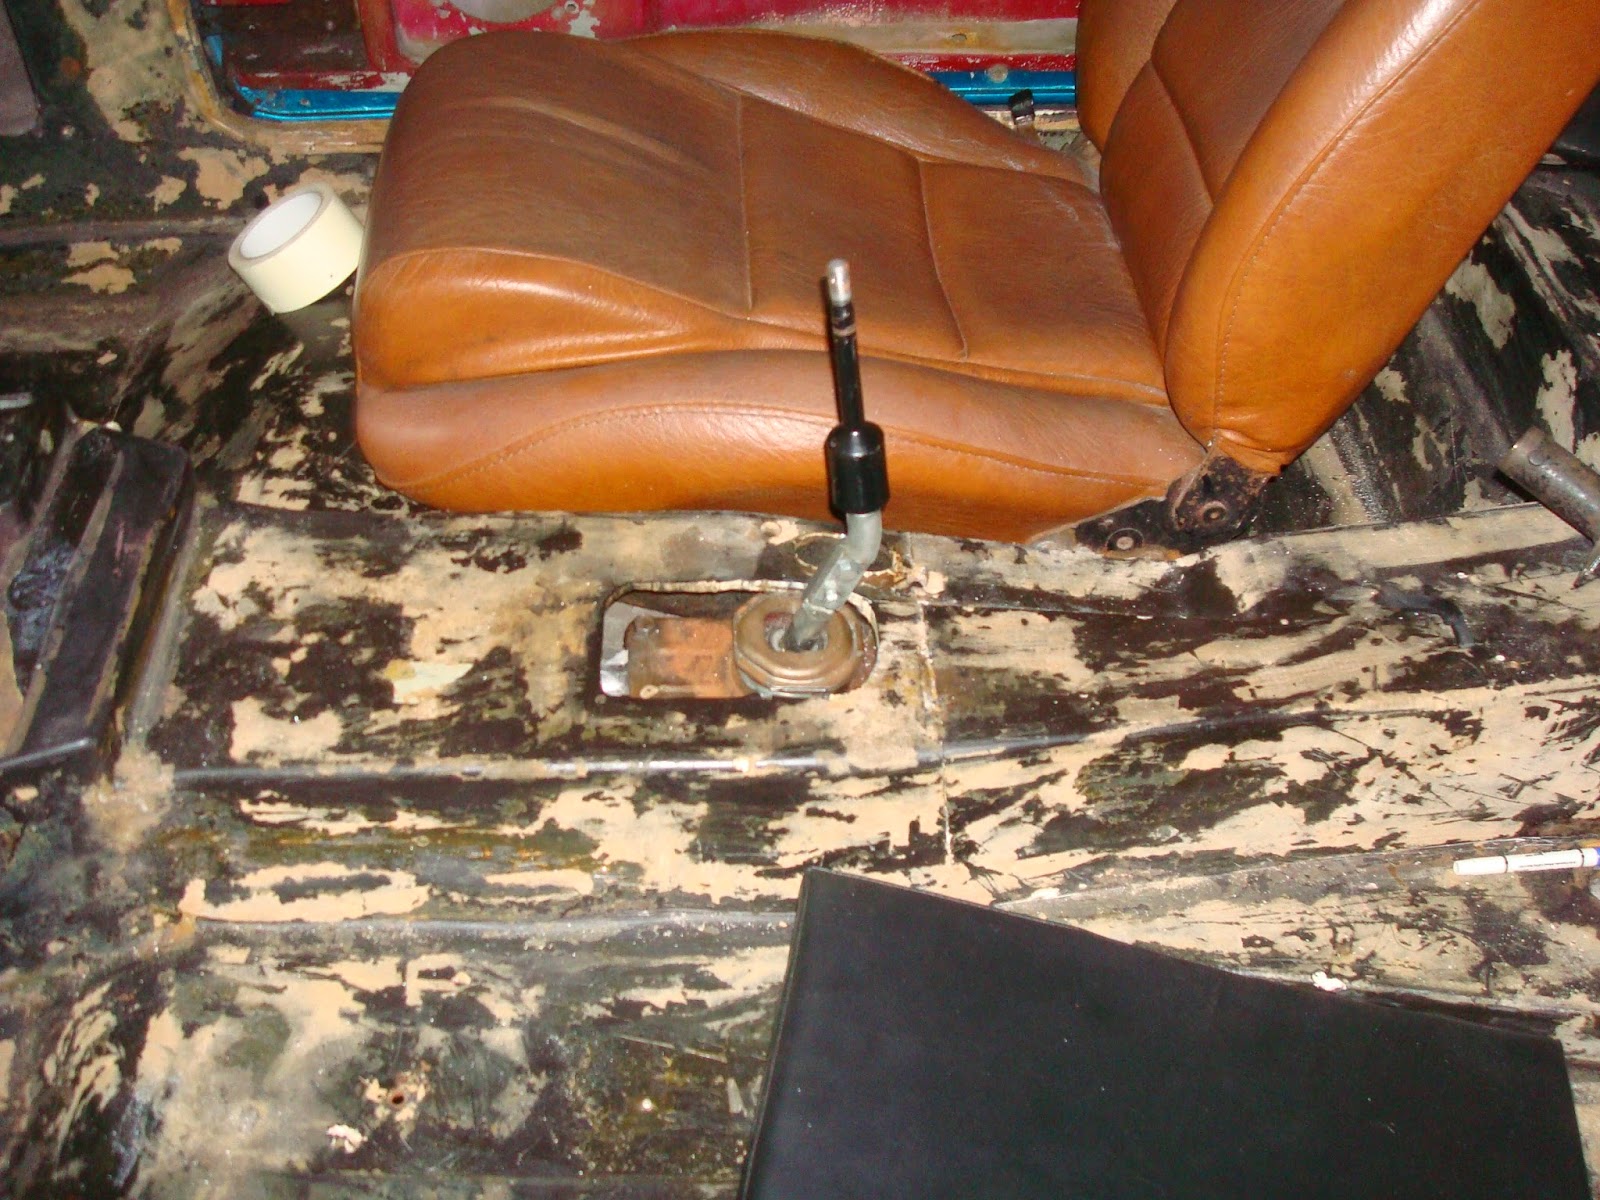
A new hole was cut into the transmission tunnel for the gear stick to protrude, with the seat in situ  its obvious the gear stick is over 5" further back and going to be awkward to operate.

The Tremec Box will position the stick closer to the dashboard, actually approximately 3" closer to the dash than the original Scimitar gearbox.


I originally bought a JED lightweight bellhousing with a concentric type slave cylinder some years ago for the Cosworth box this will now be fitted to the TVR box. to do so I will need to swap the front bearing retainer nose from the Cosworth box to the TVR box and vice versa.


Some years ago I modified the bearing retainer nose on the Cosworth box to fit into the JED bellhousing. I did this by parting off a section of the noise originally the sliding surface of the thrust bearing to allow the gearbox to mate up with the concentric salve cylinder which replaces the thrust bearing. I also turned down and faced off a good 1/4" of the front face of the nose casting to allow it to mate correctly. 

As these two parts are identical swapping them over will be easy just a matter of 8 bolts and knocking out and re fitting the two bearing races.

This will allow me to us the TVR Tremec box without modifying its nose and return the Cosworth Borg Warner box back to stock, ready for the next project.


As I plan to use the Cosworth box with a different application in the future I will simply swap the modified nose for the original one returning the Cosworth box back to original spec.


It goes without saying I will change the taper bearing and race with the noses. as its not very clever to swap a bearing and race that have been ran in together.


The new gearbox assembly ready to assemble into the car for final engine positioning and  to allow for a new mount to be designed and built.


Sunday 23 February 2014

New Dampers and Springs

The new Springs and dampers I purchased from SPAX look good. They were obviously built to order as they still smelt of fresh paint straight out of the box.

I've never used SPAX before but from what I've read and opinions of the people I've talked to they come with nothing but glorious reviews, matching AVO or GAZ the other manufactures I also considered for the Scimitar. 


The Dampers come with both an adjustable damping rate and adjustable ride height via the adjustable spring seat.

The disadvantage with this type of height adjustment is as the height adjustment is achieved via adjusting the position of the spring seat, this in turn manipulates the spring preload. This is one of the reasons why I chose the SPAX setup over my preferred choice AVO. The SPAX units came with helper springs.

Although I normally don't approve of helper springs and prefer a progressive spring on this type of damper without separate spring and ride height adjustment they do help to preserve the desired spring preload and while allowing ride height adjustment and not compromising right quality.

Obviously some detailed setup will be required in getting the damping rate and ride height correct on both the front and rear axle.


The Springs and dampers were assembled using the trusty coil spring compressor. This can be done with a smaller set of compressors, however this larger commercial grade compressors the whole coil with a single worm screw rather than two separate screws and  can be operated with a Impact gun and makes the  whole job quick and easy.

 A top tip is when using one of these large coil spring compressors is if you wish to avoid chipping the powdercoat on the brand new springs, you should wrap the coil in contact with the coil spring cups with insulation tape to protect it.

There is no need to compress the helper spring, they done add much to the total free length of the springs and have very little deflection. The helpers will be almost coil bound when the damper assembly is built  and will be fully coil bound on the car at normal ride height and only showing a small amount of deflection during droop.


An obvious upgrade on the original dilapidated KONI units.


Returning to work on Scimitar, Rear axle inspection.

Updates to this blog and work on the Scimitar have reduced somewhat due to working away from home a Masters degree and a few other projects and cars preventing me me from the work, including a 380bhp Lancer Evolution IV track car that kept me entertained for a while. However I'm going to attempt to pick up the work and update this blog periodically with the work that's been done the last few years.


My little 380bhp distraction


With the fuel tank removed the running from the zinc bath is clearly visible on the galvanized chassis.


I've inspected the rear axle and found its got a nasty knock and a few mm of unwanted play on the the NS half shaft.
 Apart from this knock and play it seems in relatively good working order and the gears at first inspection seem solid, no missing teeth, heavy wear or pitting of the steel, even the prop shaft seal and gasket around the inspection plate of the pigs head was tight with no oil leaks. it appears to be the part on the car in the best condition.


I'm still not sure what I want to do with it yet. I'm probably going to rebuild the car with the original open diff Salisbury axle and see how it handles, with the power I plan to put in the car, it may require a limited slip diff for any kind of track potential, but if I continue at this rate with major modifications ill never finish the car so for now ill overhaul the Salisbury axle. I will be fitting it with a rear disc conversion of my own design, more information on that to follow later.

Saturday 29 January 2011

New Wheels and Tyres


The latest purchase for the Scimitar is a Set of  Toyo T1R Proxies  to go on the 15x8 Revolution alloy wheels I've had kicking around for some time. I toyed with the idea of of Toyo R888’s for the car but the T1R’s were almost £500 by the time they got  them onto the rims, for R888’s it would be closer to £700. So for the first time ever for this build I made a rational decision and bought the tyres that cost a little less and will last longer.


With any car, never mind a high performance car  personally I never ever compromise with rubbish tyres, even your simple French hatchbacks should have decent rubber.  I used to run Bridgestone’s on my MG, then short of cash when the Bridgestone’s wore out I bought some nasty tyres from the PRC and now she slides all over the place and loses grip long before the Bridgestone’s ever would.  That’s why I bought the best for the Scimitar. In my opinion as well as every petrol drinking lunatic in Japan, Evo, Subaru and Skyline driver, Toyo rubber is pretty well received. Proxies are five star tyres, the only other tyres I rate as highly are Avon ZZ3, Dunlop Sport Maxx and Yokohama ADVAN AD08 depending on application.


The tyres are 225/45 R15 91V. This I belive is going to be the optimum size tyre for these wheels t for this car. I have increased the diameter of the wheel to 15 to incorporate the larger front brakes and the tyres have been widened to 225 to put down the extra power on the road, but these wheels have a ET40 negative offset to keep the track relatively close to original as possible and not compromise the handling of the car. With the from wheels I may need to run with some hubcentric spacers to avoid any clash conditions, obviously the increase in front track will slightly combat lateral weight transfer, however were talking mm's so not by much.